
This guide provides a comprehensive overview for installing Bilstein 5100 shocks on your Jeep Wrangler‚ ensuring improved performance and handling;
Designed for enthusiasts and mechanics‚ it offers step-by-step instructions to achieve optimal suspension results safely.
Overview of Bilstein 5100 Shocks
Bilstein 5100 shocks are high-performance suspension components designed for Jeep Wranglers‚ offering enhanced on-road handling and off-road capability. Known for their durability and adjustability‚ they provide a balance between comfort and performance‚ making them a popular choice among enthusiasts. The 5100 series features specific models like the B8 5100‚ which may require particular installation steps tailored to your vehicle’s make‚ model‚ and year. Ensuring compatibility‚ especially for a 2015 Jeep Wrangler‚ is crucial for optimal performance and safety.
Importance of Proper Installation
Proper installation of Bilstein 5100 shocks is crucial for safety‚ performance‚ and longevity. Incorrect installation can lead to reduced handling‚ compromised safety‚ and potential damage to suspension components. It ensures optimal ride height adjustment and maintains the shock absorbers’ effectiveness. Improper mounting or alignment can void the product warranty and lead to premature wear. Always follow the manufacturer’s guidelines and use the recommended tools to guarantee a secure and accurate fit. A well-executed installation enhances vehicle stability and delivers the intended performance improvements of the Bilstein 5100 series.

Tools and Materials Required
Essential tools include a jack‚ jack stands‚ pliers‚ and zip ties. Additional materials like safety gear and torque wrenches are recommended for a secure installation.
Essential Tools for the Installation
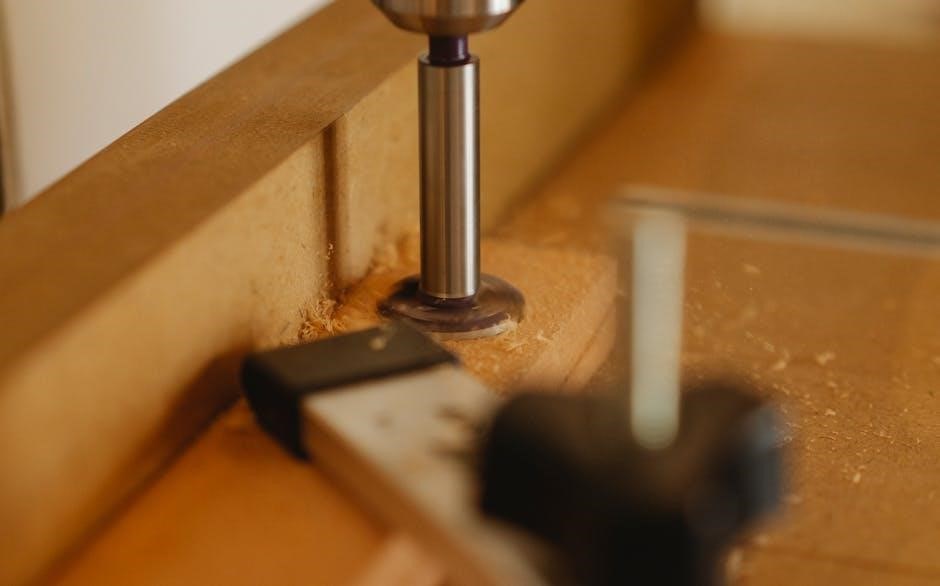
A jack‚ jack stands‚ and pliers are crucial for safely lifting and supporting the vehicle. Zip ties are recommended for organizing components during the process. A torque wrench is necessary for precise bolt tightening‚ ensuring stability and performance. Additional tools like a spring compressor may be required‚ depending on the vehicle’s setup. Always use a chassis hoist for added safety and control during the installation. Refer to the provided PDF guide for specific torque specifications and detailed instructions.
Recommended Materials and Accessories
Ensure you have a spring seat adapter‚ spring seat isolator‚ and circlip for proper installation. Protective boots and upper bushings are recommended to prevent damage and wear. A set of washers and nuts will be necessary for securing components. For optimal performance‚ consider upgrading to high-quality coil springs and sleeves. Alignment checks and wheel balancing should be performed post-installation. Lubrication for moving parts and a thorough inspection kit are also advised to ensure a smooth and durable setup.
Safety Precautions
Always use a chassis hoist and secure the vehicle properly. Wear protective gear and ensure the vehicle is stable before starting. Never work under a vehicle supported only by jack stands. Be cautious of sudden movements and wear appropriate safety equipment throughout the installation process.
Vehicle Preparation and Support
Begin by parking the vehicle on a level surface and engaging the parking brake. Use a chassis hoist to lift the vehicle securely‚ ensuring it is well-supported by jack stands to prevent any movement. Never rely solely on a jack for support during installation. Ensure the vehicle is stable and balanced before starting work. Proper support is crucial for safety and accessibility. Follow manufacturer guidelines for lifting and supporting your specific vehicle model. Always double-check the stability of the vehicle before proceeding with any installation steps.
Personal Protective Equipment
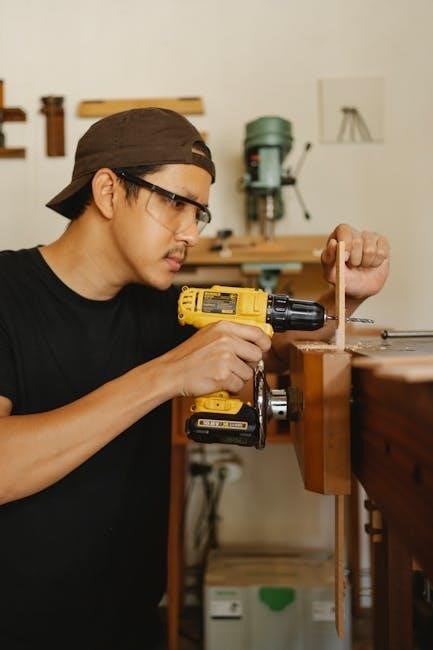
Wearing proper personal protective equipment is essential for safety during the installation process. Always wear safety glasses or goggles to protect your eyes from debris. Gloves are recommended to provide grip and prevent injuries from tools or sharp edges. A face mask may be necessary when handling dust or hazardous materials. Additionally‚ wear closed-toe shoes or steel-toe boots to ensure foot protection. These precautions will help prevent accidents and ensure a safe working environment throughout the Bilstein 5100 installation process.
Disassembling the Old Shocks
Begin by removing the nut and washer holding the old shock absorber in place using a wrench or ratchet. Carefully pull the dust boot away to access internal components.
Removing the Old Shock Absorbers
Start by loosening the shock absorber’s retaining nut using a wrench or ratchet. Carefully remove the washer and any additional components securing the old shock. Gently pull the shock absorber out of its mount‚ taking note of any springs or mounts connected to it. Ensure the vehicle is securely supported to prevent accidental movement during removal. If resistance is encountered‚ use a spring compressor or vice to safely release tension. Always handle components with care to avoid damage or injury.
Once the old shock is removed‚ inspect the area for any remaining parts or debris. Label all components for easy reassembly later. Proceed with caution to avoid damaging surrounding suspension elements.
Disconnecting Springs and Mounts
Begin by compressing the coil spring using a spring compressor to relieve tension. Carefully remove the retaining ring or circlip that secures the spring to the shock absorber. Use pliers or a specialized tool to ensure a secure grip. Once the ring is removed‚ slowly release the spring compressor and lift the spring away from the mount. Be cautious‚ as springs can exert significant force even when partially compressed.
Next‚ disconnect the upper and lower mounts by removing the bolts or nuts holding them in place. Gently pull the mounts free‚ ensuring no components remain connected to the old shock absorber. Handle all parts with care to avoid damage or injury‚ and set them aside for reassembly later.
Installing the Bilstein 5100 Shocks
Begin by installing the new Bilstein 5100 shocks‚ ensuring they are properly seated and aligned. Use a spring compressor for safe installation and set the desired ride height. Tighten all bolts to the specified torque to ensure a secure and stable fitment‚ optimizing performance and safety.
Mounting the New Shocks
Start by preparing the Bilstein 5100 shocks for installation. Ensure the shocks are properly oriented and aligned with the vehicle’s suspension components. Use a spring compressor to safely handle the springs and mounts. Carefully install the shock absorbers into their respective mounting brackets‚ ensuring they are securely seated. Tighten the upper and lower mounting bolts gradually‚ following the recommended torque specifications. Double-check the alignment and ensure all components are properly fitted before proceeding to the next step. This ensures a stable and efficient suspension system. Proper mounting is crucial for optimal performance and safety.
Adjusting the Ride Height
Adjusting the ride height on Bilstein 5100 shocks is straightforward‚ thanks to their versatile design. Begin by positioning the vehicle on a level surface and ensuring it is securely supported. Locate the circlip on the shock absorber‚ which allows for height adjustments. Refer to the manufacturer’s guide to determine the desired ride height setting; Move the circlip to the appropriate groove‚ ensuring it clicks securely into place. Tighten any related bolts according to the torque specifications provided in the instructions. Double-check the alignment and height on both sides of the vehicle for consistency. Proper adjustment ensures optimal suspension performance and vehicle stability.
Torque Specifications
Proper torque specifications are essential for securing Bilstein 5100 shocks and related components. Always consult the provided installation manual for exact torque values‚ as they vary by vehicle and application. Use a torque wrench to ensure accuracy‚ starting with the shock absorber mounting bolts and progressing to spring seats and upper mounts. Tighten all components in the recommended sequence to avoid uneven stress. Double-check torque settings after final assembly to confirm compliance with manufacturer guidelines‚ ensuring safety and optimal performance.
Reassembling the Suspension System
Reattach springs‚ bushings‚ and other components‚ ensuring proper alignment and tightness. Refer to the manufacturer’s instructions for specific torque values and sequences to ensure correct assembly.
Reattaching Springs and Bushings
Begin by carefully positioning the coil spring over the shock absorber‚ ensuring it is seated properly. Install the spring isolators to prevent noise and wear. Next‚ reattach the spring using the provided hardware‚ tightening evenly to avoid misalignment. Ensure all bushings are correctly aligned and securely fastened. Use a torque wrench to tighten all bolts and nuts to the specified torque values. Double-check the alignment of all components before moving on to the next step in the installation process. Properly securing these elements is crucial for optimal suspension performance and safety.
Reconnecting Suspension Components
After installing the Bilstein 5100 shocks‚ reconnect the suspension components carefully. Start by reattaching the coil springs‚ ensuring they are properly seated and aligned with the new shocks. Install the spring isolators to minimize noise and wear. Next‚ reconnect the suspension links and control arms‚ tightening all bolts to the specified torque values for proper alignment and security. Reattach any steering components‚ such as the steering damper‚ ensuring no play in the system. Finally‚ inspect all connections for tightness and alignment‚ and test the suspension by gently bouncing the vehicle to confirm stability and proper function.

Final Inspection and Testing
After completing the installation‚ perform a thorough inspection to ensure all components are securely fastened and properly aligned. Test the suspension by driving the vehicle on a smooth surface at moderate speeds‚ checking for any unusual noises or vibrations. If everything functions smoothly and quietly‚ the Bilstein 5100 shocks are installed correctly. This final step ensures optimal performance and safety on the road.
Checking for Proper Installation
After installing the Bilstein 5100 shocks‚ inspect all hardware for tightness and proper alignment. Ensure the shocks are securely mounted and the circlip is correctly positioned. Verify the ride height matches your desired setting. Check for any signs of damage or wear on the components. Test the suspension by bouncing the vehicle gently to ensure smooth operation. Make sure all nuts and bolts are torqued to the manufacturer’s specifications. Proper installation ensures optimal performance‚ safety‚ and longevity of the Bilstein 5100 shocks.
Testing the Suspension
After installation‚ perform a test drive on both smooth and rough surfaces to assess the suspension’s performance. Check for any unusual noises‚ leaks‚ or irregular movements. Ensure the shocks absorb impacts smoothly and maintain consistent ride height. Test braking and acceleration to verify stability and responsiveness. Inspect the suspension components for proper alignment and function. If any issues arise‚ revisit the installation steps to identify and correct potential errors. Proper testing ensures the Bilstein 5100 shocks operate as intended‚ providing enhanced handling and control.
Successful installation of Bilstein 5100 shocks enhances your vehicle’s performance and handling. Proper execution ensures safety‚ reliability‚ and improved ride quality for years to come.
Final Tips and Recommendations
After completing the installation‚ conduct a thorough test drive to ensure smooth handling and proper shock absorption. Check for any unusual noises or vibrations that may indicate improper installation.
Regularly inspect the shocks and suspension components for wear or damage. Refer to the manufacturer’s manual for maintenance schedules and adjustments. For complex issues‚ consult a qualified mechanic or suspension specialist. Keep the installation guide and torque specifications handy for future reference. A well-maintained Bilstein 5100 system will provide long-lasting performance and reliability for your vehicle.