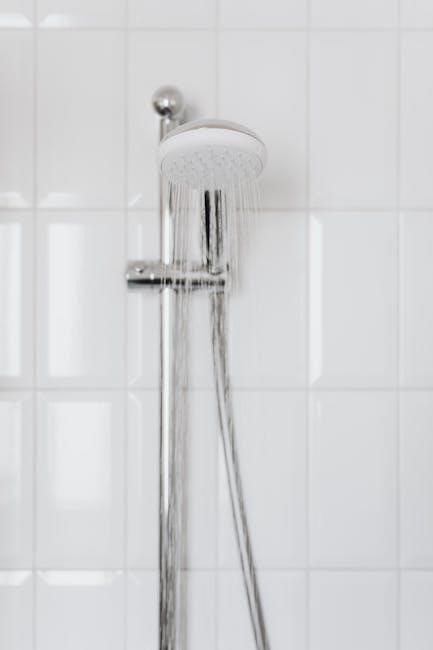
Delta shower valves are renowned for their exceptional quality‚ reliability‚ and innovative features‚ offering precise temperature control and water efficiency. Designed for durability‚ they enhance showering experiences with modern functionality.
Important Considerations Before Installation
Shut off the water supply before starting. Professional installation is recommended. Ensure all components are compatible with your system for proper function and safety.
Warnings and Safety Precautions
Always turn off the water supply before starting installation to avoid water damage or injury. Never connect deck-mount spouts to in-wall valves‚ as this can cause leaks or malfunction. Avoid using hand showers in place of tub spouts‚ as it may lead to improper function. Ensure the valve is installed correctly to prevent scalding from sudden temperature changes. Use only genuine Delta parts to maintain safety and performance. Follow the manufacturer’s guidelines strictly to prevent voiding the warranty; If unsure‚ consult a professional plumber to ensure compliance with safety standards and local regulations. Proper installation is crucial for safe and effective operation of the shower valve.
Recommendation for Professional Installation
Delta Faucet strongly advises hiring a licensed professional plumber for the installation of their shower valves to ensure proper fitting and functionality. Professionals have the expertise to handle complex plumbing systems and guarantee compliance with safety standards. Improper installation can lead to leaks‚ water damage‚ or malfunctioning components‚ which may void the warranty. A professional ensures that all connections are secure and that the valve operates as intended. Additionally‚ they can address any unexpected issues‚ such as thick wall installations‚ which require special adjustments. By entrusting the job to a professional‚ you save time‚ avoid potential risks‚ and enjoy a hassle-free showering experience. Delta’s recommendation aligns with ensuring long-term performance and customer satisfaction.

Preparation for Installation
Ensure water supply is shut off and water pressure is released before starting. Gather necessary tools‚ materials‚ and review instructions thoroughly to avoid complications.
Necessary Tools and Materials
To install a Delta shower valve‚ you’ll need specific tools and materials. Essential tools include an adjustable wrench‚ needle-nose pliers‚ a screwdriver (both Phillips and flathead)‚ a drill with bits‚ and Teflon tape for threading pipes. A bucket or container is recommended to catch water during draining. Materials required include replacement O-rings‚ gaskets‚ and any additional connectors specific to your setup. For thick wall installations‚ extensions or adapters may be necessary. Always refer to the instructions for exact requirements‚ as some models may need specialized components. Gathering all items beforehand ensures a smooth installation process and minimizes delays. Proper preparation helps prevent leaks and ensures optimal performance of your Delta shower valve.
Understanding the Components
Delta shower valves consist of key components that ensure proper functionality. The valve cartridge is the core mechanism controlling water temperature and flow. The handle or lever operates the cartridge‚ while the escutcheon plate covers the valve for a sleek appearance. Inlet ports connect to hot and cold water supplies‚ and mounting hardware secures the valve to the wall. Some models include diverter valves for directing water to different showerheads or body sprays. Understanding these parts is crucial for installation and troubleshooting. Each component is designed to work seamlessly‚ providing precise control over water flow and temperature. Familiarizing yourself with these elements ensures a successful installation and helps maintain optimal performance of your Delta shower valve.

Step-by-Step Installation Guide
Shut off water supply‚ then install the valve in the wall. Mount securely‚ connect plumbing lines‚ and adjust wall depth. Test for leaks before finalizing the setup.
Mounting the Shower Valve
Begin by ensuring the wall area is clear and water supply is shut off. Align the shower valve with the water supply lines‚ ensuring proper positioning. Use a mounting bracket to secure the valve to the wall‚ tightening screws firmly but avoiding overtightening. Ensure the valve is level to maintain proper function and aesthetic appeal. Refer to the manufacturer’s specifications for correct wall depth to prevent protrusion issues. Double-check all connections before proceeding to the next steps. Proper mounting is essential for leak prevention and long-term durability. Follow the provided instructions carefully to ensure a stable and secure installation. This step sets the foundation for the entire system’s functionality and reliability.
Connecting Plumbing and Components
After mounting the valve‚ connect the hot and cold water supply lines to the corresponding ports on the valve‚ ensuring they are securely attached with appropriate fittings. Use Teflon tape or pipe dope on threaded connections to prevent leaks. Attach the showerhead or hand shower to the valve’s outlet‚ following the manufacturer’s guidelines. If using additional components like a diverter or volume control‚ connect them according to the installation sequence provided. Double-check all connections for tightness and alignment to avoid water leakage. Properly securing these components ensures optimal water flow and system performance. Refer to the Delta shower valve instructions for specific fitting types and torque specifications to guarantee a leak-free connection and reliable operation.
Setting the Correct Wall Depth
Properly setting the wall depth ensures the Delta shower valve operates smoothly and maintains a flush installation. Measure the thickness of your shower wall to determine if extensions or shims are needed for the valve. For standard walls‚ the valve typically mounts flush‚ but thicker walls may require additional components. Adjust the valve’s depth by loosening the mounting nuts and sliding the valve into position. Ensure the valve is aligned with the showerhead or handle for proper function. Tighten the mounting nuts securely to hold the valve in place. If the wall is too thick‚ refer to Delta’s guidelines for extended installation solutions. Correct wall depth prevents leaks and ensures the valve operates within its design specifications for optimal performance and safety.

Troubleshooting Common Issues
Common issues with Delta shower valves often relate to leaks‚ inconsistent water flow‚ or temperature control problems. If water leaks from the valve‚ check for worn-out seals or gaskets‚ which may need replacement. For low water flow‚ clean or replace the filter screen in the valve inlet to ensure proper water pressure. If the temperature is difficult to regulate‚ ensure the cartridge is installed correctly and free from mineral buildup. Adjust the scald guard to prevent excessively hot water. If issues persist‚ refer to the Delta Faucet website for specific troubleshooting guides or contact customer support. Regular maintenance‚ such as cleaning and replacing worn parts‚ can prevent many common problems. Always follow the manufacturer’s instructions for repairs to ensure safety and optimal performance.

Maintenance and Care Tips
Regular maintenance is crucial to ensure the longevity and optimal performance of Delta shower valves. Clean the valve and surrounding areas with a mild detergent and soft cloth to prevent mineral buildup and maintain hygiene. Check for leaks periodically and replace worn gaskets or seals promptly. Descale the valve regularly if you live in an area with hard water‚ as mineral deposits can affect performance. Use a cartridge removal tool to inspect and clean the internal components annually. Avoid harsh chemicals or abrasive cleaners‚ as they may damage the finish or internal parts. For optimal functionality‚ ensure the valve is properly calibrated‚ and the scald guard is adjusted to your desired temperature range. Following these maintenance tips will keep your Delta shower valve functioning smoothly for years to come.
Focusing on the Delta MultiChoice Universal Shower Valve
The Delta MultiChoice Universal Shower Valve stands out for its versatility and adaptability‚ making it a top choice for modern bathroom setups. This valve is designed to accommodate various shower configurations‚ including single-function‚ dual-function‚ and thermostatic options‚ ensuring it fits seamlessly into any design. Its universal compatibility allows it to work with a wide range of trim kits‚ giving homeowners the flexibility to customize their shower system without replacing the entire valve. The MultiChoice valve also features Delta’s advanced Scald Guard technology‚ which prevents sudden temperature fluctuations‚ ensuring a safe and comfortable showering experience. Additionally‚ its rugged construction and high-quality materials ensure long-lasting durability. With its easy-to-install design and extensive customization options‚ the MultiChoice Universal Shower Valve is a practical and stylish solution for any bathroom renovation or new installation project. Its innovative design and reliable performance make it a favorite among both homeowners and professionals alike‚ ensuring years of trouble-free operation and satisfaction. By incorporating this valve‚ users can enjoy enhanced functionality‚ efficiency‚ and aesthetic appeal in their shower systems.
Installing and maintaining a Delta shower valve requires careful planning and adherence to guidelines for optimal performance. Key takeaways include shutting off water supply before installation‚ using recommended tools‚ and following Delta’s specific instructions. Professional installation is advised for complex setups to ensure safety and functionality. Proper maintenance‚ such as cleaning and inspecting components regularly‚ extends the valve’s lifespan. Delta’s MultiChoice Universal Shower Valve offers versatility for various shower configurations‚ while models like the R22000 provide advanced features like temperature control. By understanding the components‚ following step-by-step guides‚ and addressing common issues promptly‚ users can enjoy a reliable and efficient shower system. Always refer to Delta’s official resources for troubleshooting and care tips to maintain peak performance and longevity of your shower valve.

